Gmail Features for Teachers (Tricks & Tips)
Here are some teacher tricks & tips I think you might find useful when using Gmail in your Google Apps school. You can find more information at the Google Apps Education Training Center. Some of these features must be enabled by your Google Apps administrator at your school.
1. Signature with Social Media Icons
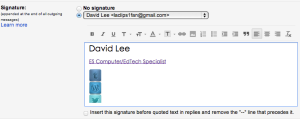
You can automatically place a signature at the end of every email you send. I have included my name, teacer position (linked to my website), and social media icons that link you to the education SM sites.
- Settings > General > Signature
- Insert Images of social media icons using these URLs
- Link your personal social media URLs on the icons
- Settings > General > Vacation Responder
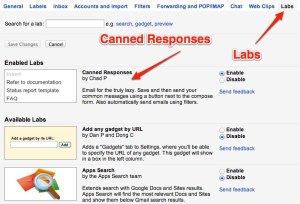
- Settings > Labs
- Choose a lab and click enable
- Save Changes
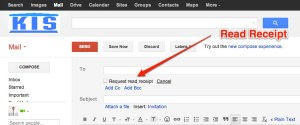
4. Read Receipts (only for Google Apps for Education)
If you click on "Request read receipt," then you will receive an email notification that confirms that your students opened your email and what time the email was opened. The "I never got it" excuse will never work again!
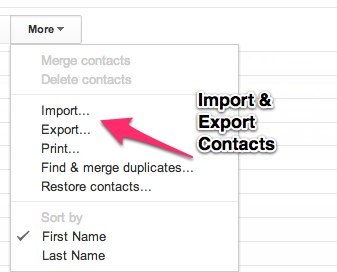
5. Import & Export Contacts
Import contacts from your other webmail provider as a CSV file. You can export contacts from your Gmail account as well.
- Contacts > More > Import/Export
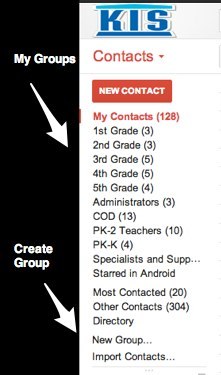
6. Create contact groups
This feature will let you email specific groups, such as students, parents, teachers, or administrators.
- Go to "Contacts" via the "Mail" menu on the top left side
- Click on "New Group" and type in your contacts
- OR select your contacts, go to "More" menu and click on "Create New"
7. Use Labels to organize your class or subject
There are some differences between Labels and Folders.
- Your conversations can be grouped in multiple labels (you can only place an email conversation into one folder).
- You can place a conversation into multiple places, such as Inbox, Sent Mail, etc. (you need to recall which folder you placed your email conversations)
- Specific labels can be searched.
Here are the steps you will take to create and use labels for your emails:
1. Go to Settings > Labels > Create new label.
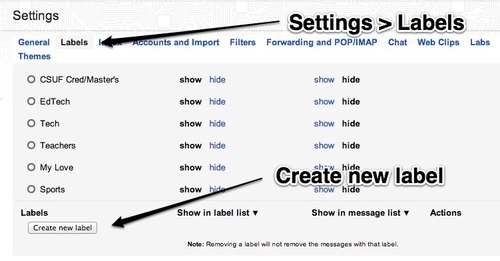
2. Enter the name of your label.
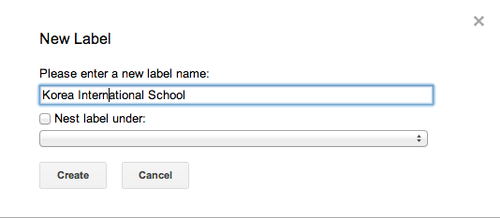
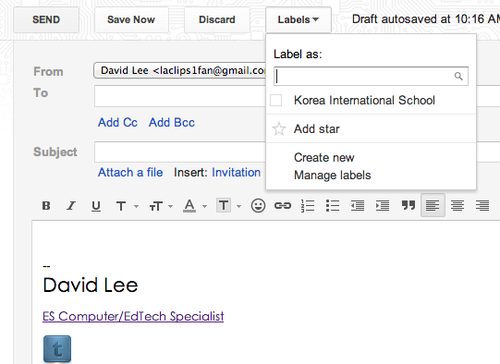
3. Compose an email and go to the Labels drop menu. Click on the box of the label you wish to use. Then click on Apply.
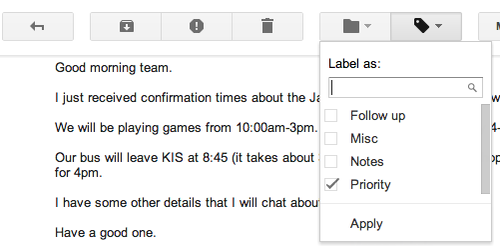
4. You can also place labels on existing emails.
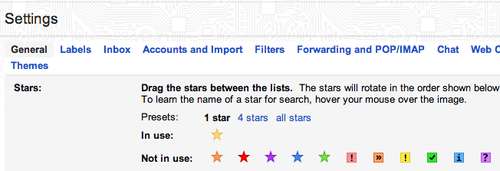
8. Mark your emails with Stars to indicate what type it is
- Go to Setting > General > Stars
- Drag the stars or icons you would like to use into the "In use:" section.
You can give each star or icon its own meaning. Search for stars by typing "has:" and the type of star in the search box (ex. has:blue-star). You can also find your starred emails in the sidebar menu labeled Starred.
9. Advanced Search to find emails
The search box is located at the top of your Gmail account. You can type operators followed by a colon to find specific emails.
Some operators you can type:
- subject:
- OR
- label:
- has:
- filename:
- cc:
- bcc:
- after:
- before:
- is:chat
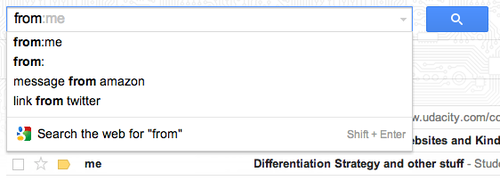
You can also click on the small arrow on the right to drop down the advanced search box.
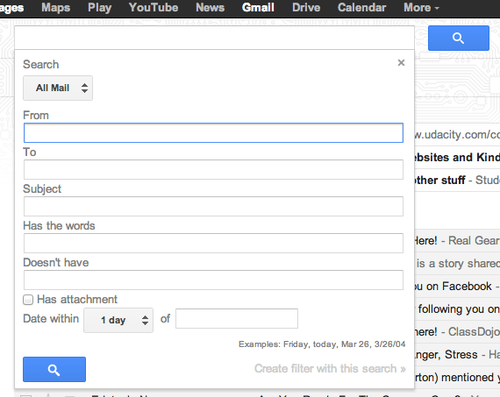
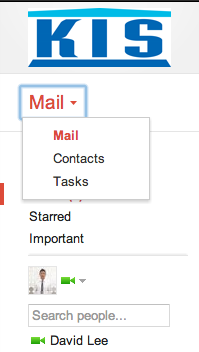
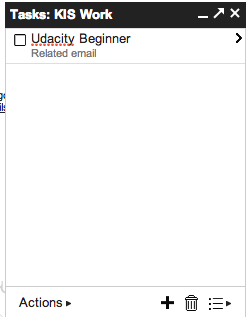
10. Tasks (Google's To-Do List)
Google Tasks allows you to add your important school tasks into a convenient list. You can access your list by clicking on the drop down menu under the Google logo (or your school logo).
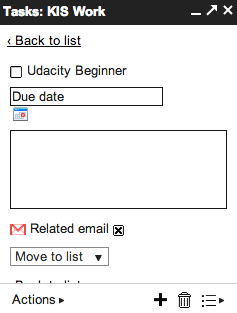
You can add dates and detail/notes to each of your school tasks by clicking on the arrow on the right. Due dates can be established and will appear on your Google Calendar.
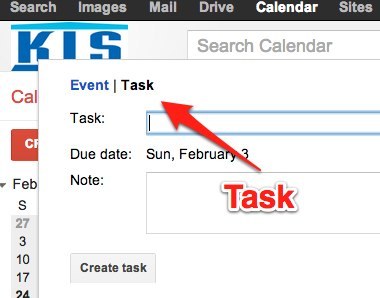
You can also create a task with a specific due date from your calendar. Click on a day, then go to Task instead of Event.
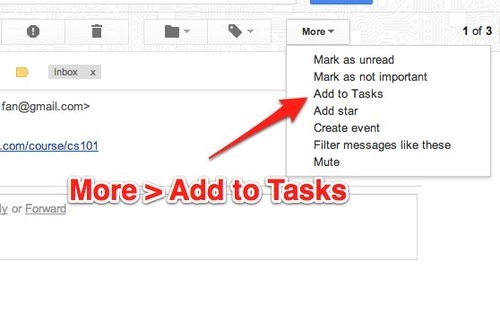
The best feature I think for teachers is the ability to add an email to your list. For example, I am planning to include programming into my ICT curriculum so I emailed myself the link to a free programming course. I added this task by opening my email, clicking on More, and then on Add to Tasks.
11. Offline Mail with Google Chrome
Teachers are not always accessing emails at a place where there is Internet connection. If you use Google Chrome as your web browser, you can then install the Offline Google Mail app from the Chrome Web Store for free. The data from your web Gmail is continuously being synchronized when you are online; so that when you are offline, you will have access to the data you need to compose emails or reply to your students.
12. File Formats that can be viewed with Google Docs Viewer
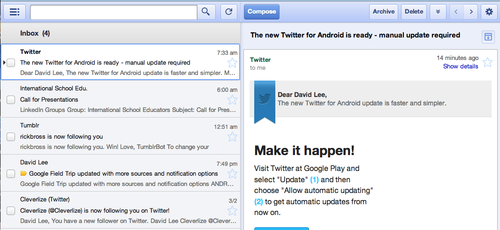
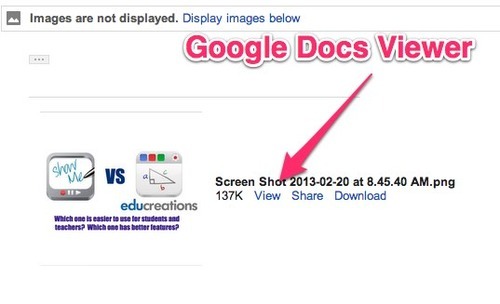
You can click on View to see email attachments quickly with Google Docs Viewer. Here are the file formats you can view:
- Microsoft Word (DOC or DOCX)
- Microsoft Excel (.XLS and .XLSX)
- Microsoft PowerPoint 2007 / 2010 (.PPTX)
- Apple Pages (.PAGES)
- Adobe Illustrator (.AI)
- Adobe Photoshop (.PSD)
- Autodesk AutoCad (.DXF)
- Scalable Vector Graphics (.SVG)
- PostScript (.EPS, .PS)
- TrueType (.TTF)
- XML Paper Specification (.XPS)
13. Enable IMAP in Settings
Google recommends enabling IMAP (Internet Message Access Protocol) instead of POP (Post Office Protocol) because of its:
- two-way communication between web Gmail and email clients (ex. New mail and actions made in your web Gmail will appear in your email clients and mobile devices, and vice versa).
- ability to avoid dropped messages and sending multiple copies of the same message.
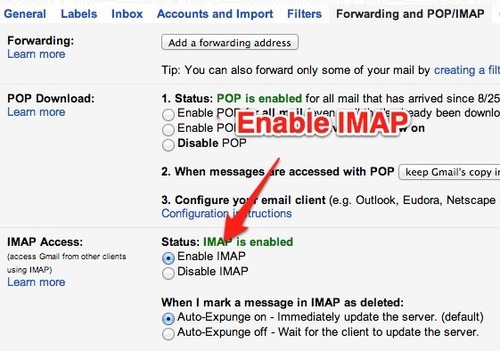
Steps in enabling IMAP:
- Settings
- Forwarding and POP/IMAP
- Go to IMAP Access
- Enable IMAP
14. Group chat
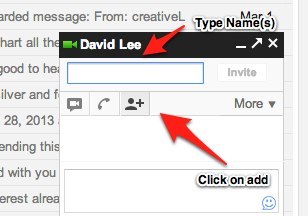
Communicate with a group of students or teachers with Google Chat. Go to Chat on the left side of your Gmail. Click on the person you want to contact. A small chat window should pop up in the right hand corner. Click on the add person icon and type in the additional students or teachers you want to invite.


Comments
Post a Comment